
🎥 Video Tutorial: Sinewave Hat
- Renee Rivera
- Sep 7, 2025
- 3 min read

Updated: Mar 2
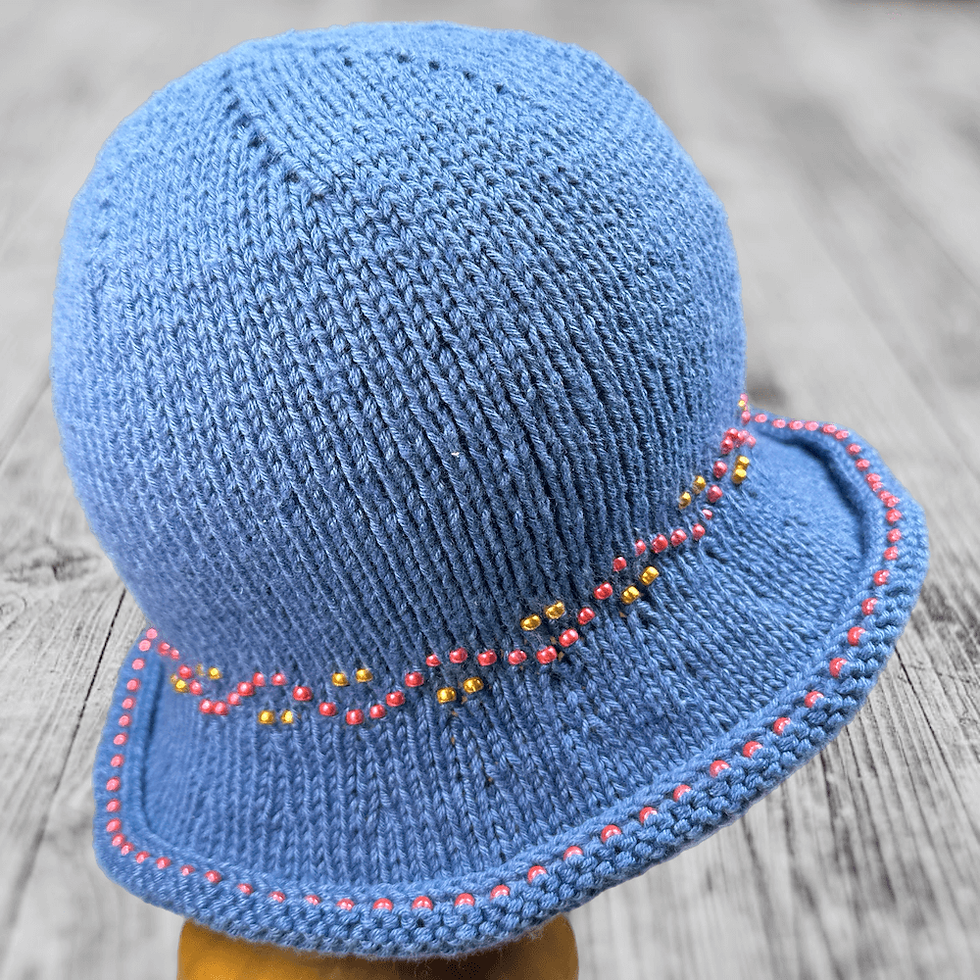
Inspired by trigonometry, the Sine Wave Hat takes its name from the graceful wave pattern that moves across its beaded band. I’ve always loved the intersection of math and creativity, and this design brings that to life with a unique rhythm of stitches and beads.
👉 Follow along with the free video tutorial or grab the paid PDF pattern to guide you stitch by stitch — both options are below.
✨ Why I Designed Sine Wave
My inspiration for the Sine Wave beaded knit hat came from the desire to create a soft, comfortable, and travel-friendly hat that could be worn with multiple outfits. The bead design had to be pretty and uncomplicated. When I finished designing the beaded portion of the hat, it reminded me of a sine wave from trigonometry, ergo the name. Yay! I remembered something from math class." 😆

Sine Wave is knit seamlessly from the top down in one piece using a single circular needle. Beads are added as you go — no pre-stringing required — which saves time and gives you full control over bead colors and placement. That means you can switch colors mid-project or easily correct placement if needed.

Sine Wave's rolled edge naturally curves upward, framing the beadwork beautifully. It also adds structure and creates a neat little channel if you’d like to insert millinery wire for a more sculpted hat brim.
🧶 Materials I Used in the Tutorial
Yarn: 2 skeins of Premier Bamboo Fair, DK weight (#3 Light), in Indigo. Work with both strands held together.
Circular Needle: 22 – 24in|58.90 – 61cm cable with interchangeable tips in sizes 4.5mm (US-7) and 3.75mm (US-5).
Crochet Hook: 1.15 mm
Beads: Miyuki, 6/0 Rocaille Round (4mm):180 beads for Bead Color 1 (BC1) and 48 beads for Bead Color 2 (BC2).
Tools: 1 locking stitch marker, tapestry needle, scissors, and a ruler.
Blocking Materials: Whatever you prefer for blocking hats (head/hat form, mat, etc.)
Optional:
Tape Measure for measuring the wearer’s head.
Additional stitch marker(s) to keep track of st groups when working increases and
beadwork.
Beading board.
💡 Customization Ideas
Alternate bead colors every few stitches or rows.
Shift bead colors gradually for an ombré (gradient) look.
Mix matte and metallic beads for shimmer.
Use slightly larger or smaller beads for a different texture. Also, try different bead brands such as Toho (you may have to adjust the crochet hook size to fit the bead's hole).
Use a bold yarn color with neutral beads or vice versa,
Insert millinery wire for a sculpted brim.
Use variegated yarn—one that gradually changes colors. The shifting shades will add movement and dimension beneath the beads, making them stand out even more.
🎥 Watch the Free Tutorial
🖨️ Want the Printable Digital Pattern?
PDF Pattern Includes:
Video tutorial and timestamps
Size customization options
Clear project photos
Pattern support
Printable gift tags featuring original artwork
👉🏼 Find it on: Ravelry
Bundle & Save! Buy 2 patterns, save 5%; 3 save 10%; 4+ save 15%. Discount applied automatically at checkout.
💜 Final Thoughts
When I designed the Crowned with Kindness hat, I made a personal promise: every hat I made would be gifted to someone who could use a little extra kindness. I’ve been making and donating these beanies ever since, and the reactions I’ve received have filled my heart.
I plan to keep gifting Crowned with Kindness hats for as long as I’m able. If this project brings even a small moment of comfort or joy to someone, then I’m grateful.
What yarn or bead colors would you choose for this design? Share your ideas in the comments below 💬. Thank you for being here with me—Renée 🤗 💕
Comments